Connecting Your Zoom Account
Prerequisites: Active Rocketplace seller account, valid Zoom account (Basic, Pro, or Business), completed seller profile setup.
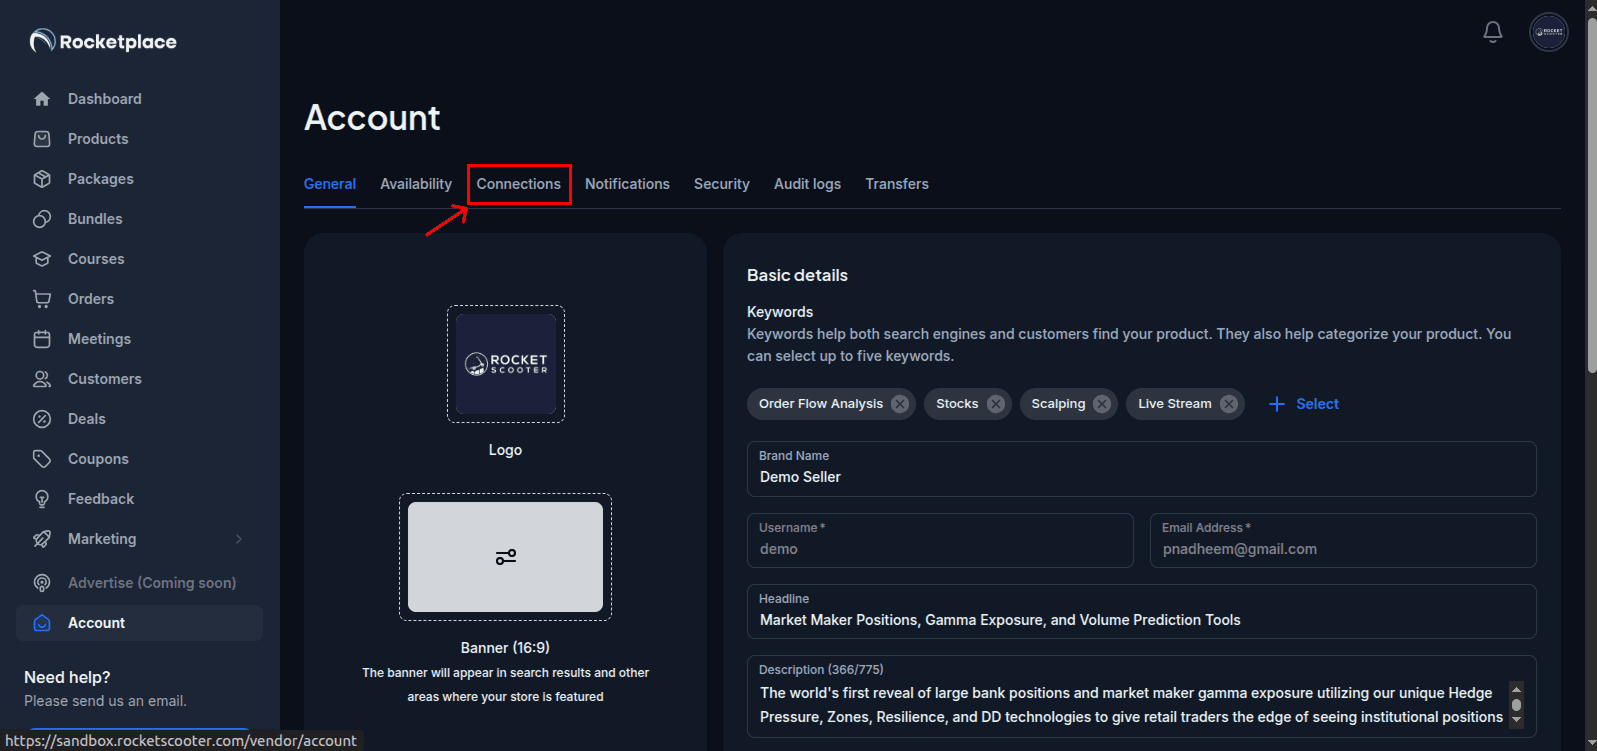
- 🏠 Access Your Account Settings: Navigate to "Account" in your seller dashboard sidebar.

- 🔗 Find Connections Tab: Click the "Connections" tab in your account page.
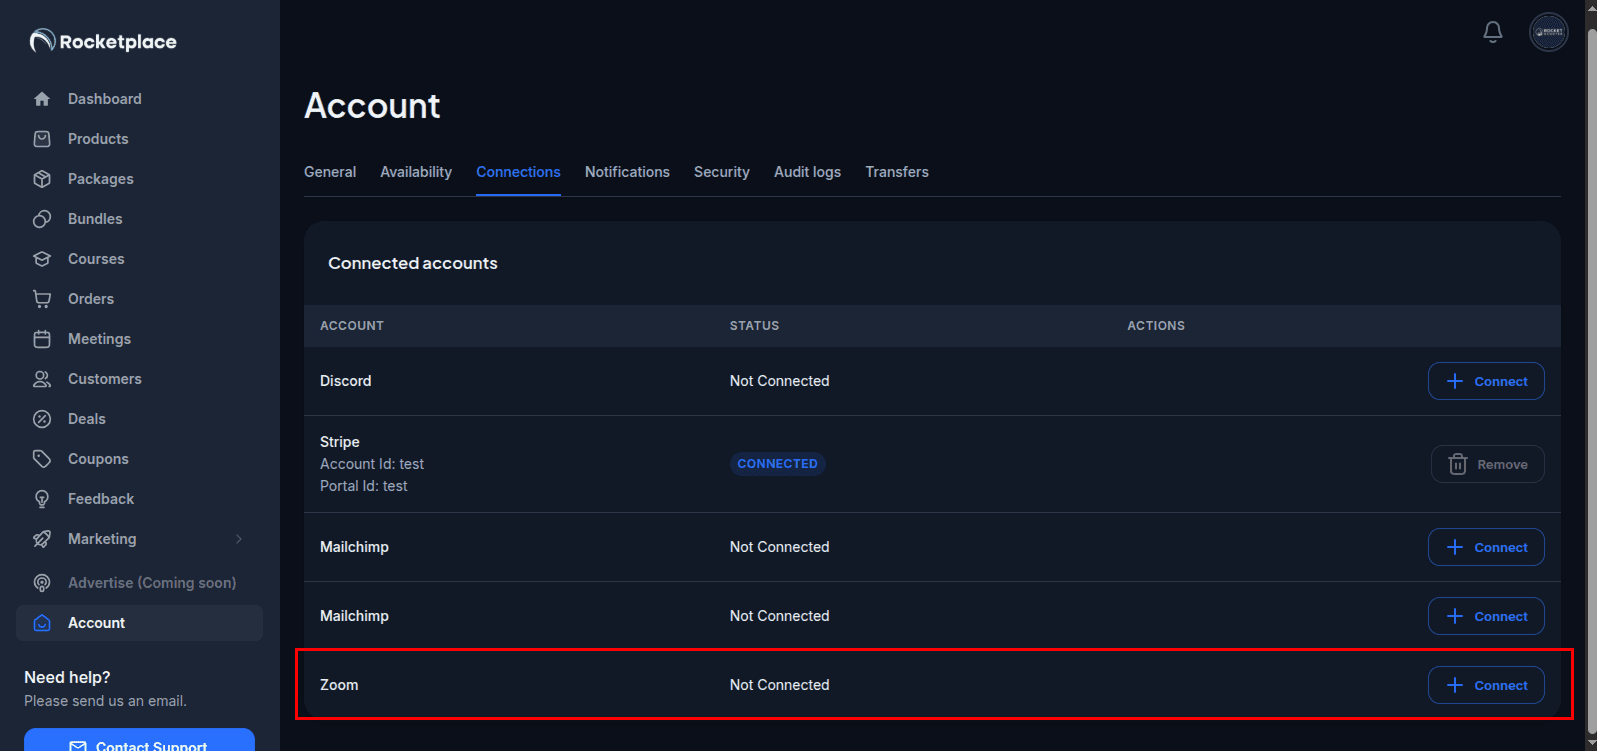
- ⚡ Connect Zoom: Locate "Zoom" in the connection list and click "Connect" button.
- ✅ Authorize Access: Complete Zoom OAuth authorization and approve required permissions.
- 🎉 Verify Connection: Confirm "Connected" status appears with success message.
Troubleshooting Setup Issues
- Connection Failed: Clear browser cache and try again in incognito mode.
- Authorization Loop: Ensure pop-ups are enabled for rocket.place.
- Still Having Issues? Contact [email protected] with screenshots.
Usage
Once connected, create automated 1-on-1 meeting services that generate Zoom meetings when clients book and pay.
Creating 1-on-1 Meeting Services
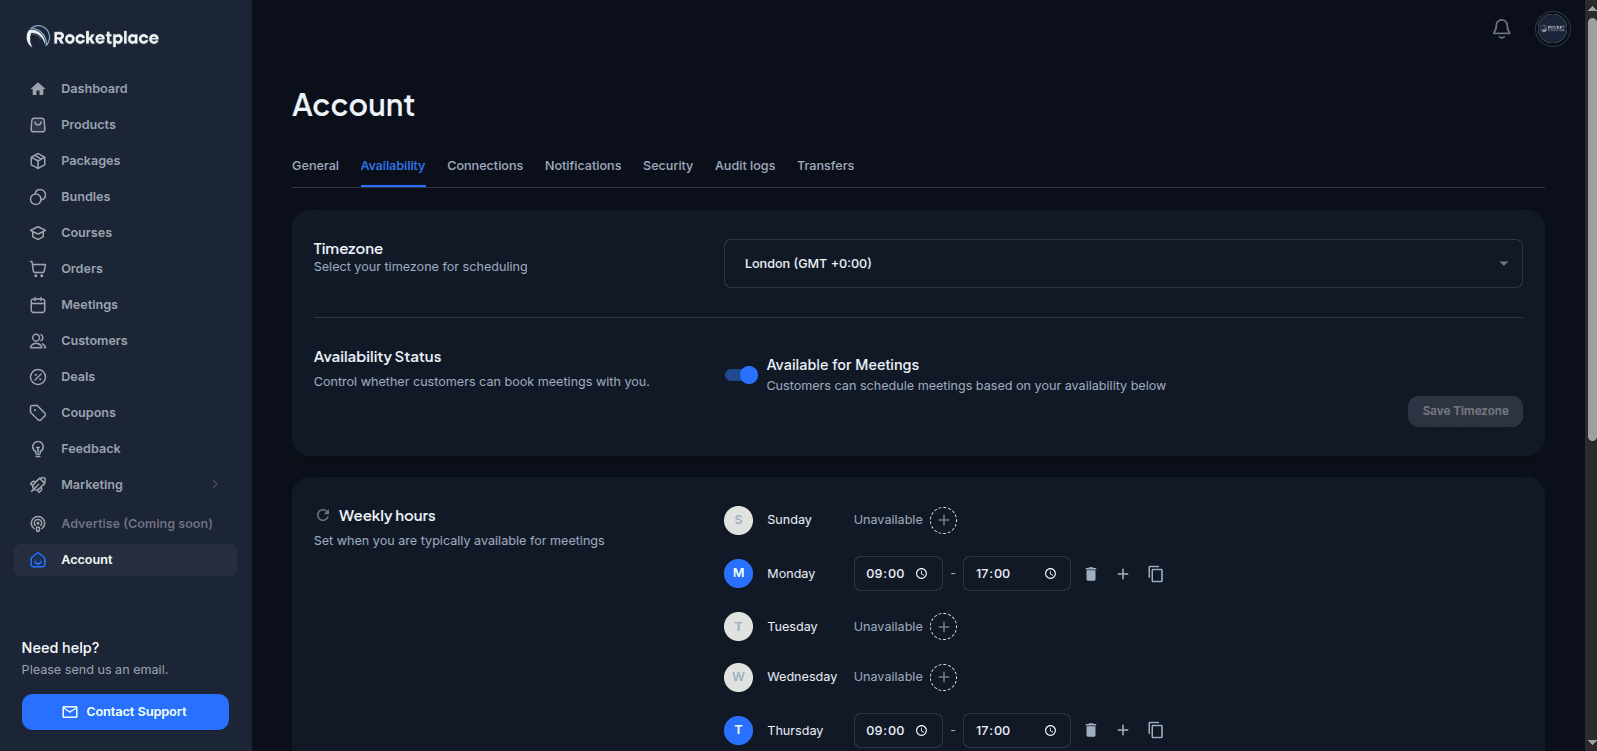
- Set Up Availability: Go to Account → Availability to configure your schedule.
- Create New Product: Navigate to Products → Add Product → Select "1-on-1 Meetings".
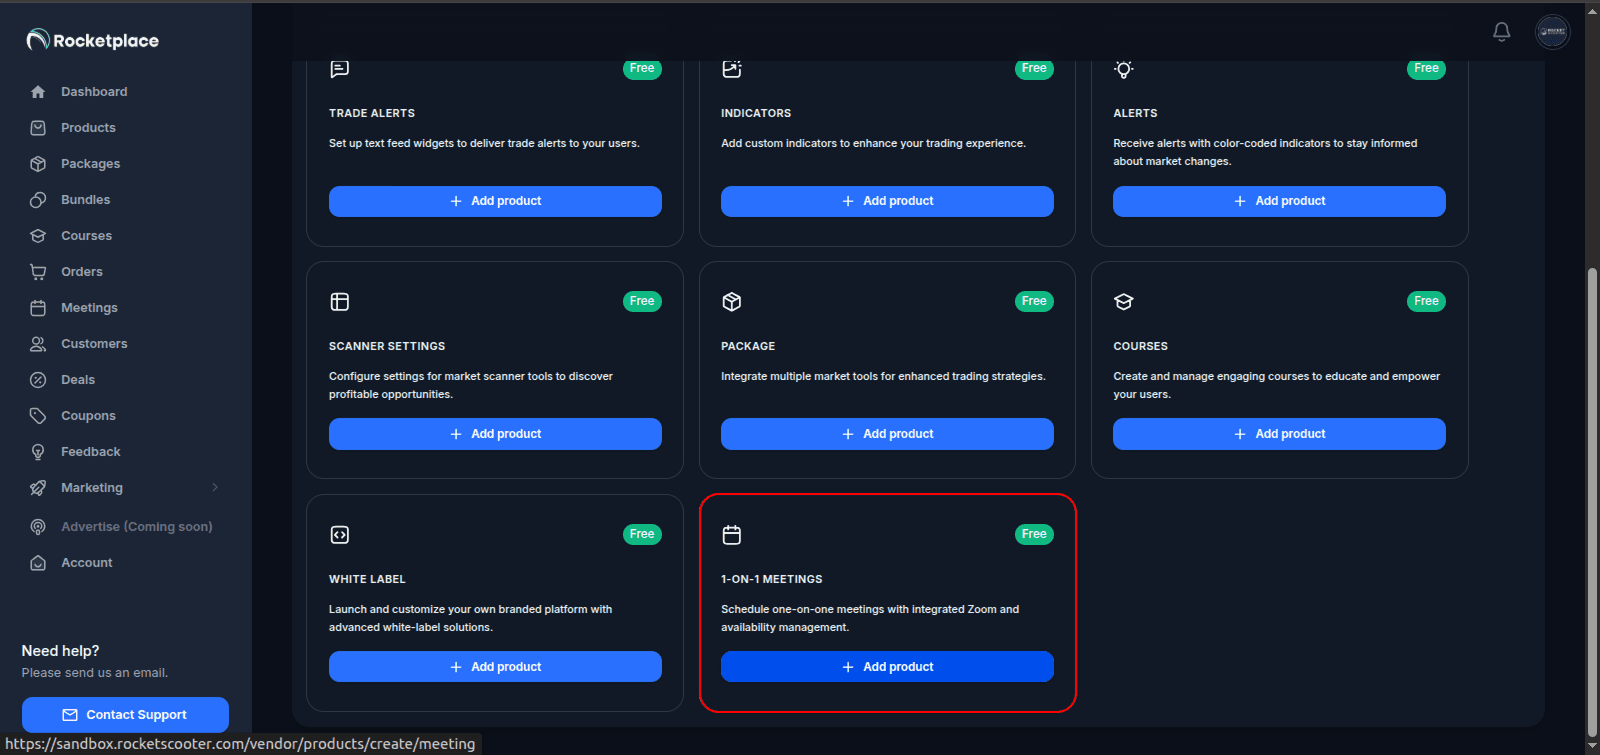
- Configure Details: Set duration (15-180 minutes), category (Trading, Gaming, Music, Coaching, Fitness, Live Streaming), price and description.
- Publish Service: Review details and click "Publish" to make available to clients.
How Client Booking Works
- Client Books: Selects time and completes Stripe payment.
- Auto-Creation: Zoom meeting automatically created in your account.
- Email Notifications: Both parties receive meeting details via email.
- Calendar Invites: Automatic .ics file generation and delivery.
Managing Your Meetings
- View Meetings: Check "Meetings" in sidebar for all scheduled sessions.

- Start Meeting: Click "Start Meeting" to join as host.
- Reschedule: Use "Reschedule" to update times (Zoom meeting updates automatically).
Removing the App
You can remove the Zoom integration in two ways:
Method 1: From Rocketplace Dashboard
- Access Settings: Go to Account → Connections in your seller dashboard.
- Disconnect: Find "Zoom" and click "Disconnect", confirm when prompted.
Method 2: From Zoom Marketplace (Complete Removal)
- Sign in to Zoom App Marketplace: Visit marketplace.zoom.us and log in.
- Access Management: In the top right corner, click "Manage".
- Find Added Apps: On the left side, click "Added Apps".
- Locate Rocketplace: Find the "Rocketplace" app and click "Remove".
- Confirm Removal: Select a reason (optional) and click "Remove" to confirm.
What Happens When You Remove
- No New Meetings: Automatic creation stops immediately.
- Existing Meetings: Remain in your Zoom account unchanged.
- Data Deletion: Your tokens deleted from our servers after 30 days.
- Reconnection: Always possible anytime in the future.
Troubleshooting
- "Meeting Not Created": Use "Reschedule" feature to regenerate meeting.
- "Payment Successful but No Meeting": Wait 5 minutes, check Meetings dashboard.
- "Client Can't Join": Send fresh meeting link from Meetings dashboard.
FAQ
- Q: What Zoom plan do I need?
A: Any plan works (Basic, Pro, Business, Enterprise) — even free accounts. - Q: Can I connect multiple Zoom accounts?
A: Currently one Zoom account per seller account is supported. - Q: Are my credentials stored securely?
A: Yes, all authentication tokens encrypted with AES-256 encryption. - Q: Can Rocketplace access my other Zoom meetings?
A: No, we only access meetings created through the Rocketplace platform.
Contact Support
Need help? Our support team is here to assist with your Zoom integration.
- 📧 Email: [email protected]
- ⏰ Hours: Monday - Friday, 9:00 AM - 6:00 PM EST
- ⚡ Response: 24 hours maximum response time
- 💡 Before contacting: Check this guide and include screenshots of errors